GAMES DEVELOPMENT- EXERCISES

15/4/20- 13/5/20 (Week 1- Week 5)
Andrea Vie Choong Jia Qi (0331945)
Games Development
Exercises
_____________________________________________________________________________
LECTURES
Lecture 1: Introduction to the module & Elements of Game Design
15/4/20 (Week 1)
For our side-scolling game to be successful, we need to consider the gameplay, the challenges for each level and the storyline. Before that, we need to write a Game Design Document.
Lecture on Elements of Game Design:
https://docs.google.com/presentation/d/1YGv5Ozuo9UBxq672BwAIu28SSI-bByiYUeXLox7QAS0/edit?usp=sharing
Lecture 2:-
22/4/20 (Week 2)
We had no lecture this week. We are put in groups and we had to generate game ideas using three keywords:
1. Incorporate
2. Improve
3. Inverse
Lecture 3:-
6/5/20 (Week 4)
This week, we learned how to input scripting for the character control in Unity. We used the character from the provided spritesheet.
Here is the Google Drive link:
i. Character Control: Idle (Standing Position)
1. Drag the character sprite into the asset
Sprite Editor: Texture- Sprite (2D and UI) & Sprite Mode- Multiple
2. Open the Sprite Editor> Slice (Automatic) & change the Label each character as "Idle_1" and so on
3. Add 3D object>Cube and name it as "Character" and drag in the Idle character
4. Add Box Collider to highlight the area of the character (adjust the box to the character's size)
5. Add Rigidbody for character's gravity (make sure that the freeze rotation: X,Y,Z & freeze position: Z)
6. Add 3D object>Cube and name it as "Ground" to stop the character from falling
7. Go to Animation>Create> Name animation as "ninja_idle" & drag the Idle to the animation frame and adjust the keyframes to have equal spacing.
8. Add New Script to create the script for the control of "Idle" and type the following:
public class CharacterControl : MonoBehaviour
{
public float moveSpeed = 10.0f;
// Update is called once per frame
void Update()
{
float move = Input.GetAxis("Horizontal");
GetComponent<Rigidbody>().velocity = new Vector3(move * moveSpeed, GetComponent<Rigidbody>().velocity.y, 0);
}
}

Fig 1.1 Labelling each character element in Sprite Editor

Fig 1.2 Animating the character (Idle) to move along the ground
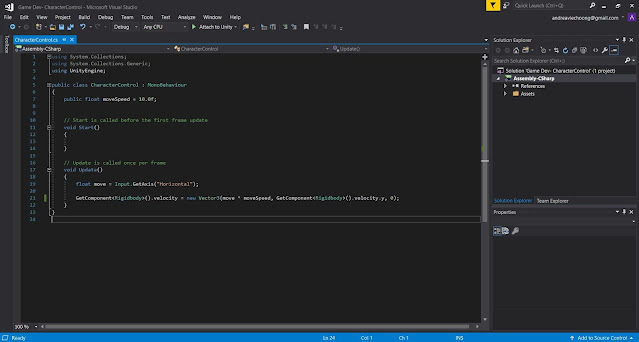
Fig 1.3 Script for the character control (left & right)
ii. Character Control: Run
1. Change the Label each character as "Run_1" and so on
2. Under "ninja_idle", add new clip (ninja_run) and drag the Run character into the animation frame (adjust the keyframes)
3. Open back the script and add the following:
public class CharacterControl : MonoBehaviour
{
private Animator anim;
// Start is called before the first frame update
void Start()
{
anim = GetComponent<Animator>();
}
// Update is called once per frame
void Update()
{
Debug.Log(move);
anim.SetFloat("Speed", Mathf.Abs(move));
}
}
4. Go to Animator, add new transition to ninja_run and back to ninja_idle
5. From ninja_idle transition line, go to Parameter (+)>Float and Speed is created
6. Adjust Speed to 1.0
7. At the settings, untick the Exit Time and Fixed Duration and change transition duration "0" and condition (Speed) to "Greater" "0"
8. Do the same with ninja_run transition line but change the transition duration "0.1" and condition (Speed) to "Less" "0.1"

Fig 1.4 Adjusting keyframe (speed) of character's run

Fig 1.5 Script for character control between idle and run

Fig 1.6 Animator panel to transit from idle to run

Fig 1.7 Animator panel to transit from run to idle
------------------------------------------------------------------------------------------
Lecture 3:-
13/5/20 (Week 5)
This week, we covered more controls to use for the character and how to insert the key value (hp bar,etc) to the game.
i. Add virtual camera (cinemachine)
1. Go to Windows>Package Manager>Cinemachine and install it
2. It will appear at the top panel
3. Cinemachine>Create a virtual camera>CM vcam1
4. Adjust the camera to not center, use "follow offset"
i. Character jump control
1. Open "Character Control" script and type the following:
if (Input.GetButtonDown("Jump") && grounded) (to check the input for jump control)
2. To check the input, go to Edit>Project Settings>Input Manager
3. Add another script to activate the jump control and type the following:
public class CharacterControl : MonoBehaviour
{
public float jumpSpeed = 20.0f;
}
void Update();
{
if (Input.GetButtonDown("Jump") && grounded)
{
GetComponent<Rigidbody>().velocity = new Vector3(0, jumpSpeed, 0);
}
}
4. To adjust jump speed, change it in the script component.
5. Adjust the speed of fall, go to Edit>Project Settings>Physics>Gravity and at Y axis
ii. Add tag to component (e.g. Ground component) and script
1. Go to "Ground" and and click "add tag"
2. Click + and add "myground"
3. Add "myground" tag
4. To add script to multiple grounds, go to "CharacterControl" script
public class CharacterControl : MonoBehaviour
{
public bool grounded;
}
5. To define the collision between the character and ground, type the following after script in step 3:
private void OnColliderEnter(Collision other)
{
if(other.gameObject.tag == "myground")
{
grounded = true;
}
}
private void OnColliderExit(Collision other)
{
if (other.gameObject.tag == "myground")
{
grounded = false;
}
}
private void OnCollisionStay(Collision other)
{
if (other.gameObject.tag == "myground")
{
grounded = true;
}
}
6. To set double jump, type the following under script in step 3:
if (Input.GetButtonDown("Jump") && grounded)
{
GetComponent<Rigidbody>().velocity = new Vector3(0, jumpSpeed, 0);
doublejump = true;
isJumping = true;
}
if (Input.GetButtonDown("Jump") && !grounded && doublejump)
{
GetComponent<Rigidbody>().velocity = new Vector3(0, jumpSpeed, 0);
doublejump = false;
}
7. Then to set the values in Animator, add the following:
anim.SetBool("isJumping", isJumping);
8. Add float (speed) and bool (isJumping) in the parameter
9. Create transitions from ninja_idle to ninja_jump and back
10. Add conditions: is jumping=true, less than 0.1/ false for ninja_jump to idle
11. Do step 9 &10 to ninja_run to ninja_jump and back

Fig 1.8 Settting value of jump control in parameter
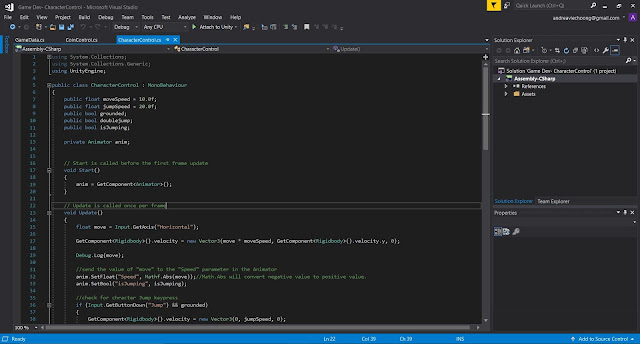
Fig 1.9 Script #1 for character jump control

Fig 1.10 Script #2 for character jump control

Fig 1.11 Script #3 for character jump control
ii a. Collision with the character and coin item
1. Drag coin_sheet to the assets & go to Sprite Editor to slice each object
2. Drag the coin sprite to the hierarchy and name it as "Coin" (resize the coin to 0.5 and z-0)
3. Create new animation "coin" and drag the keyframes
4. Add box collider to "Coin"
5. Add new script "CoinControl" and type the following:
private void OnTriggerEnter(Collider other)
{
if (other.gameObject.name == "Character")
{
Destroy(gameObject);
}
}
6. Go back to scene, make sure the box collider "Is trigger" is checked
ii b. Duplicate coin (using Prefab)
1. Drag coin from hierarchy back to assets
2. Add the coin to the scene

Fig 1.12 Coin object added to the scene

Fig 1.13 Script for eliminating coin object when character collides with it
iii. Add key value to the game
1. Right click > Create empty and name it as "_Game Brain"
2. Put it at the top of the hierarchy
3. Add new script "GameData" and add the following:
public int coinCount = 0;
4. Go to "CoinControl" script and type the following:
private GameData GameData; (to inform that the coin count will be indicated in game data)
5. Add the following script under private void:
GameData.coinCount += 1; (to inform that the coin count is stored in game data)
6. Add another script below it:
Debug.Log(GameData.coinCount); (to know that the coin count value is saved in game data)

Fig 1.14 GameBrain object created to indicate key value

Fig 1.15 Script to add coin count into the gamedata

Fig 1.16 Script to add coin count values into the gamedata and record the value
Final Result:
------------------------------------------------------------------------------------------
Lecture 5:-
20/5/20 (Week 6)
This week, we learned how to add "game over" pop up or screen and collect objects that we can use in our game project.
i. Create new screen "Game Over_Win"
1. Add new scene "GameOver_Win"
2. Create a UI>Canva & UI>Panel (change colour of Panel)
3. Under Panel, UI>Text "Game Over"
4. Adjust the font size & colour accordingly
5. Add another text "You Win"
6. Open game data script and add the following:
using UnityEngine.SceneManagement;
void Update()
{
if(coinCount == 4)
{
SceneManager.LoadScene("GameOver_Win");
}
}
7. Make sure the scenes are in build settings, File>Build Settings

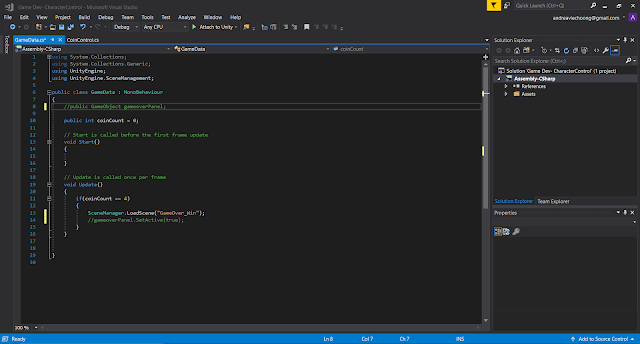
Fig 1.18 Script to link "SampleScene" to "GameOver_Win" scene
ii. Create a pop up panel "Game Over_Win" & add animation
1. Go to "SampleScene" and do the same like in step 2
2. UI>Panel and set it transparent
3. Add image and place "element-13" in source image
4. Add text "Game Over" & label the canvas "CanvasGameOver"
5. Uncheck the canvas, open Game data script and add the following:
public GameObject gameoverPanel;
void Update()
{
if(coinCount == 4)
{
gameoverPanel.SetActive(true);
}
}
6. Drag "CanvasGameOver" to the gameoverPanel under script component
7. Create new animation "screen_gameover" to CanvasGameOver
8. Select panel, record animation and drag the panel under the screen at 00.00
9. At 00.50, drag the panel back
10. At 00.25, add keyframe
11. At 00.00, add property>image>image>colour (+) and expand the colour
12. At colour, a, go to 00.35, add keyframe and change value to 1
13. Uncheck the CanvasGameOver and uncheck the loop time


Fig 1.20 Script for activating "Game Over" pop up screen
iii. Coin Animation | Activate & Spawn Animation
1. Drag "coin_sheet_0" from sprite to scene and adjust size
2. Add new animation "coin_collected" and add 1st keyframe
3. At 00.50, drag coin upwards
4. To add fade in, sprite renderer>colour(+)
5. At 00.25, add new keyframe
6. At 00.50, expand the colour>colour a, add value 0 and at 00.25 to 1
7. At 00.25, add property>transform>scale and add keyframe
8. At 00.50, change scale to 1
9. At "coin_collected", uncheck loop time
10. Change "coin_sheet_0" into prefab
11. Delete it from hierarchy

Fig 1.21 Create animation for the coin to disappear after collection
12. To activate, select Coin and go to coin control script, type the following:
public GameObject coinAnimation;
13. Drag "coin_sheet_0" to coin animation under the script component in the prefab mode
14. To trigger the animation, add the following:
var mycoin = Instantiate (coinAnimation, gameObject.transform.position, gameObject.transform.rotation);
15. Open the "coin_sheet_0" and apply root motion
iv. gemHealth animation activation & trigger
1. Add the asset "gemHealth" into the hierarchy
2. Create new animation "health collected"
3. Create an animation
4. Drag the "gemHealth" back to the assets to create a prefab
5. In the prefab, create new script "Health Control" and type the following similar to the "Coin Control" but changing the target to gemHealth.

Fig 1.23 Animation for gemHealth to disappear after collection

v. Particle effect for gemHealth
1. Search for "Simple FX- Cartoon Particles"
2. Open CoinControl script and add the following:
public GameObject explosion;
public GameObject sparkle;
if(gamedata.coinCount == 3)
{
var explode = Instantiate (explosion, spawnPoint.transform.position, spawnPoint.transform.rotation);
var spark = Instantiate (sparkle, spawnPoint.transform.position, spawnPoint.transform.rotation);
Destroy(explode,2);
}
4. Add the particle effects for explosion and sparkle under CoinControl and click Ovverides>Apply All


Fig 1.26 Script for spawning particle effects
Final Result:
------------------------------------------------------------------------------------------
Lecture 6: Door Activation | Key Collect | Character Run Control | Enemy Control
27/5/20 (Week 7)
This week, we continued further from the previous class and learned how to activate the open/close door, collect key to activate door, character run control and enemy control.
i. Door Open/Close
1. Drag door sprites to assets
2. Drag door 1 to scene and label it "Door"
3. Add box collider and increase the y-index so the character can't pass through (uncheck is trigger)
4. Add new animation "Door_idle" and drag door 1 to add keyframe
5. Create new clip "Door_open", drag in all the door sprites as keyframes (uncheck loop time)
6. Create empty "Door Trigger">Add component>Box Collider (check is trigger) and adjust the size (4,4,4) and place it next to the Door
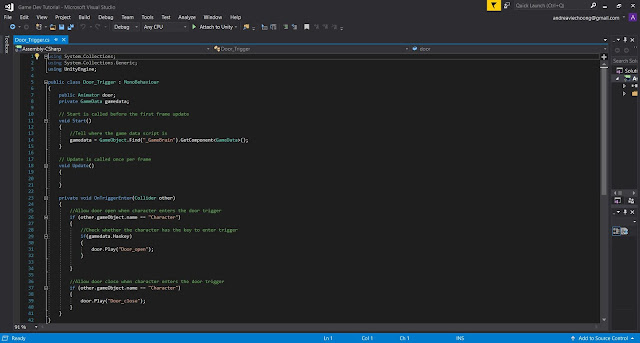
7. Door Trigger>Add script "Door_Trigger" and type the following:
public Animator door;
8. Drag Door to "Door" panel in script
9. Go back to the script and add the following:
private void OnTriggerEnter (Collider other)
{
if(other.gameObject.name == "Character")
{
door.Play("Door_open");
}
}
10. At Door, go to Door_open, record>at last keyframe (uncheck box collider)
*For "Door_close", repeat step 4-5, duplicate Door Trigger and add the following:
private void OnTriggerEnter (Collider other)
{
if (other.gameObject.name == "Character")
{
door.Play("Door_close");
}
}

Fig 1.27 Animation for Door open/close
ii. Collect key to activate Door
1. Drag "gem-key" to assets
2. Add box collider (check is trigger)
3. Add script "Key Collect" and type the following:
private void OnTriggerEnter (Collider other)
{
if (other.gameObject.name == "Character")
{
Destroy(gameObject);
}
}
4. At "Game Brain", open "Game Data" script and type the following:
public bool hasKey = false;
5. Go back to "Key Collect" script and add the following:
private GameData gamedata;
void Start()
{
gamedata = GameObject.Find("_GameBrain").GetComponent<GameData>();
}
private void OnTriggerEnter (Collider other)
{
if (other.gameObject.name == "Character")
{
if(gamedata.HasKey)
{
door.Play("Door_open");
}
}

Fig 1.29 Add box collider to gem-key

iii. Spawn gem-key after collecting 5 coins
1. Create a prefab for gem-key and delete it from hierarchy
2. Create empty "Key Spawn"
3. Open Coin Control script and type the following:
public GameObject key;
void Start()
{
KeySpawn = GameObject.Find("KeySpawn");
}
private void OnTriggerEnter(Collider other)
{
if(gamedata.coinCount == 5)
{
Instantiate(key, KeySpawn.transform.position, KeySpawn.transform.rotation);
}
}
4. Drag gem-key prefab to Key in Coin Control script, click Overrides>Apply All

Fig 1.31 Script #1 to spawn gem-key

Fig 1.32 Script #2 to spawn gem-key
iv.Character Run Control
1. Character>Animation>Create new clip "Ninja_attack"
2. Drag attack_1 to 5 as keyframes
3. At Animator>Add parameter>Bool "isAttacking"
4. Make transition from idle to attack (set Speed Less 0.1, isAttacking True) and vice versa
5. Make transition from run to attack (set Speed Greater 0.1, isAttacking True) and vice versa
6. Open Character Control and type the follwoing:
public bool isAttacking;
void Update()
{
if(Input.GetButtonDown("Fire1"))
{
isAttacking = true;
anim.SetBool("isAttacking", isAttacking);
}
if(Input.GetButtonUp("Fire1"))
{
isAttacking = false;
anim.SetBool("isAttacking", isAttacking);
}
}

Fig 1.33 Animation panel for character run

Fig 1.34 Animator parameter for character run

Fig 1.35 Script #1 for character run control

Fig 1.36 Script #2 for character run control
v.Enemy Control
1. Drag enemy_idle to assets
2. Create new animation "Enemy1_idle"
3. Add component>Box Collider (adjust the box size) & Rigidbody (freeze position: z, rotation: x,y,z)
4. At Character>Create empty "SlashPoint">Add component>Box Collider (check is trigger)
5. In Animation, select Ninja_attack>record>at 0.00(uncheck box collider) and at about where the sword reveals (check box collider)
6. At Enemy1>Add new script "Enemy 1 Control" and type the following:
private void OnTriggerEnter (Collider other)
{
if (other.gameObject.name == "SlashPoint")
{
Destroy(gameObject);
}
}
7. To make the SlashPoint is not activate all the time, SlashPoint>Animation>Ninja_idle>Record (uncheck SlashPoint) at 0.00
8. Do the same to Ninja_run & Ninja_jump
9. For Ninja_attack (uncheck Slashpoint at 0.00) and check when the sword appears

Fig 1.37 Enemy_idle Animation & Box Collider

Fig 1.38 Slashpoint to destroy enemy
v.Enemy Hit Effects
1. Search for effects for hitting the enemy and the enemy destroyed
2. Open Enemy 1 Control script and type the following:
public GameObject hitEffect;
public GameObject blood;
public int HP = 2;
private void OnTriggerEnter (Collider other)
{
if (other.gameObject.name == "SlashPoint")
{
var hit = Instantiate(hitEffect, gameObject.transform.position, gameObject.transform.rotation);
Destroy(hit,2);
HP -= 1;
Debug.Log(HP);
if(HP <=0)
{
var enemyblood = Instantiate(blood, gameObject.transform.position, gameObject.transform.rotation);
Destroy(enemyblood, 2);
Destroy (gameObject);
}
}
}

Fig 1.39 Script to activate/trigger slashpoint & enemy destroy effects
Final Result:
INFORMATION
Module Information Booklet (MIB)
__________________________________________________________
EXERCISES
Exercise 1: Reviewing our senior's platform games
15/4/20 (Week 1)
We played our senior's games and wrote positive remarks and problems as well as improvements for the game.

Fig 1.1. Reaper's Test
Positive remarks:
- Art asset (main character, background, obstacles) was well designed
- Many obstacles like the monsters to keep the player engaged in the game
- The Health and XP bar at the top left was simple and straightforward
Problems:
- No final fight between the main character and the villain
- Frustrating as the game gets quite challenging
- When the character is not close to the obstacle (like the spinning sharp wheel), the character immediately dies
Improvements: the game could be better if there was a last difficult level where the main character has to defend the villain in order to win.
2. Dream Cream Survival of Sweetness

Fig 1.2. Dream Cream Survival of Sweetness
Positive remarks:
- The art assets were cute and aesthetic.
- Obstacles like the onions and broccoli distracted the player from getting the ingredients for the cake
- The life hearts are clearly presented
Problems:
- No final fight between the main character and the villain
- The storyline was not interesting as the main objective is to collect the ingredients to bake a cake
- No instruction on the controls given when the player needs to use when playing the game
- Obstacles are hard to defend which is time-consuming
Improvements: The storyline can modify to interest the player and enhance the game objective. Instructions can be written bigger as the player may have trouble reading it.
3. The Adventure of El Nino

Fig 1.3 The Adventure of El Nino
Positive remarks:
- The art assets were really aesthetic and detailed
- The theme of the game was unique
- Instructions were clear and precise.
- The life bar is clearly displayed.
Problems:
- Not a big range of difficulty added when the player progresses to each level.
Improvements: The complexity of the levels can be improved to make the player more engaged in the game. The obstacles can be different at each level.
Exercise 2: Generate Game Ideas
22/4/20 (Week 2)
1. Harvest Moon
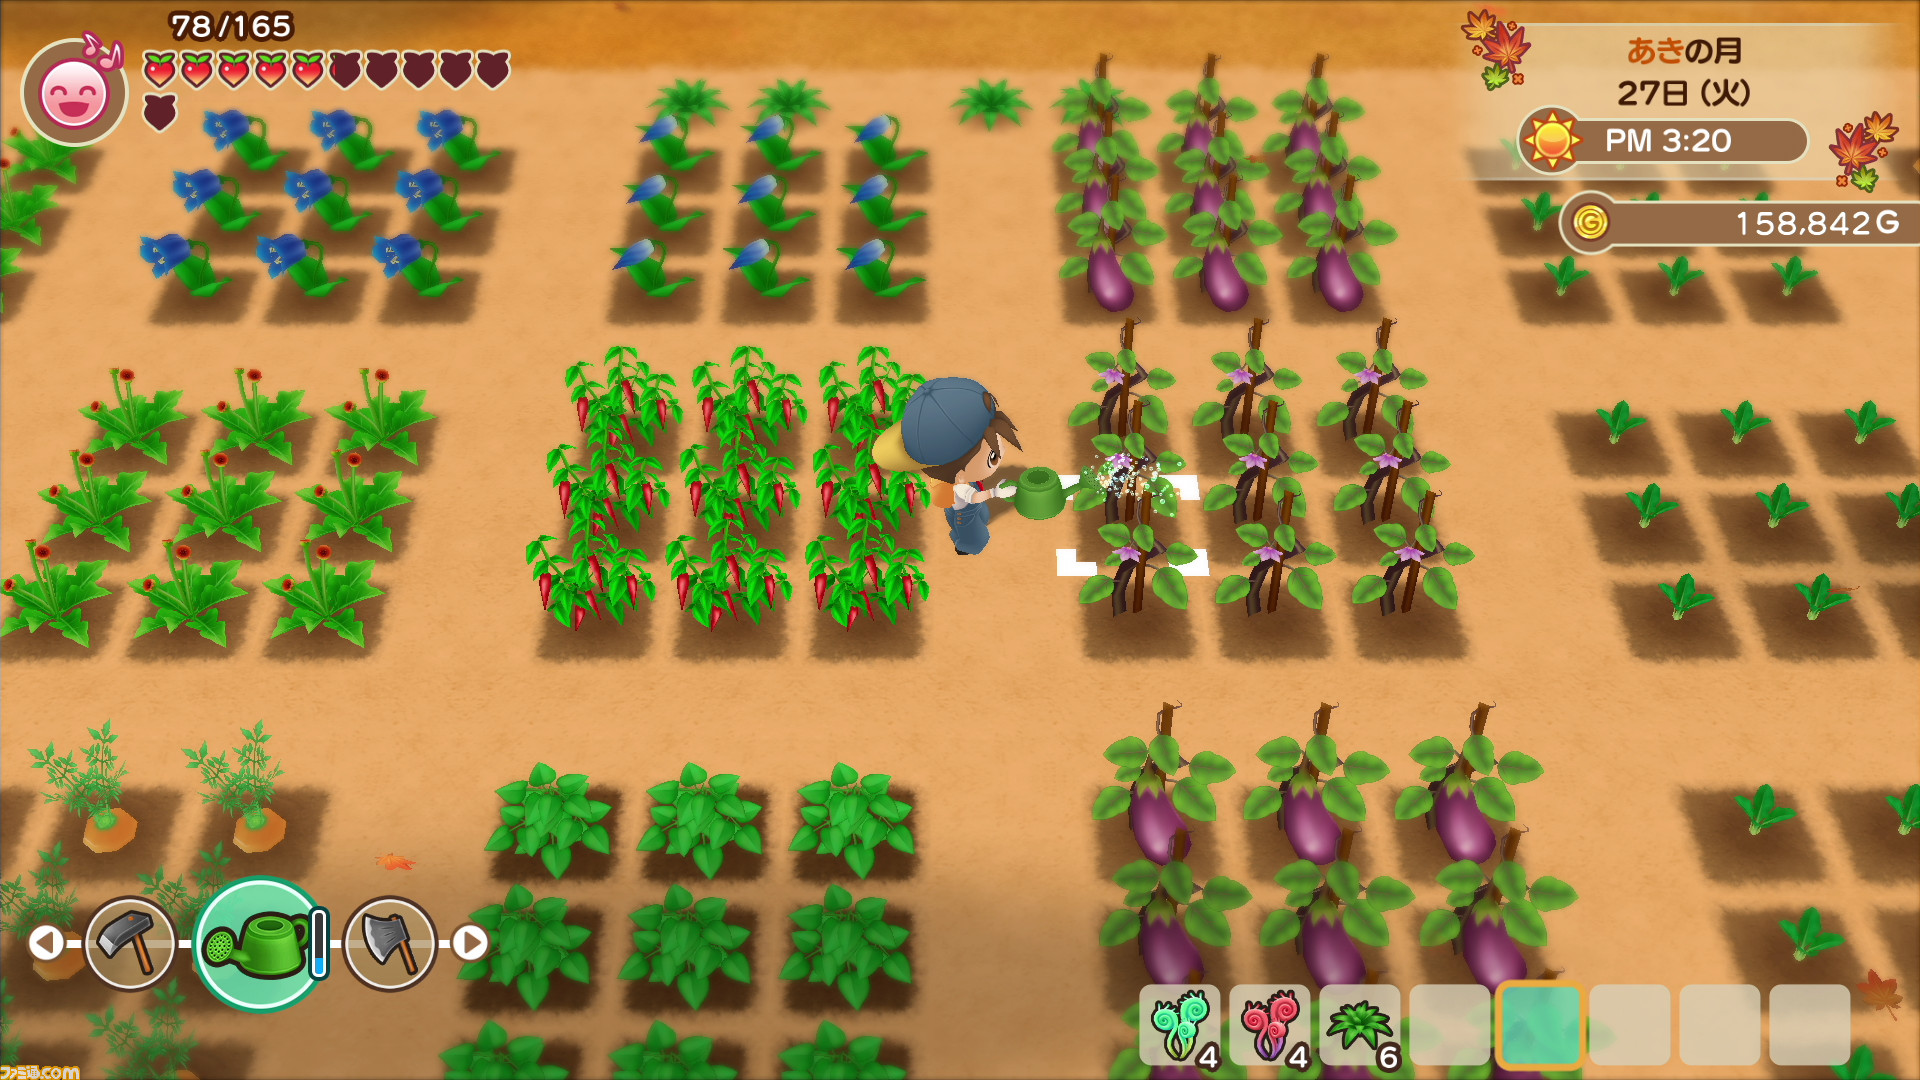
Fig 2.1 Harvest Moon
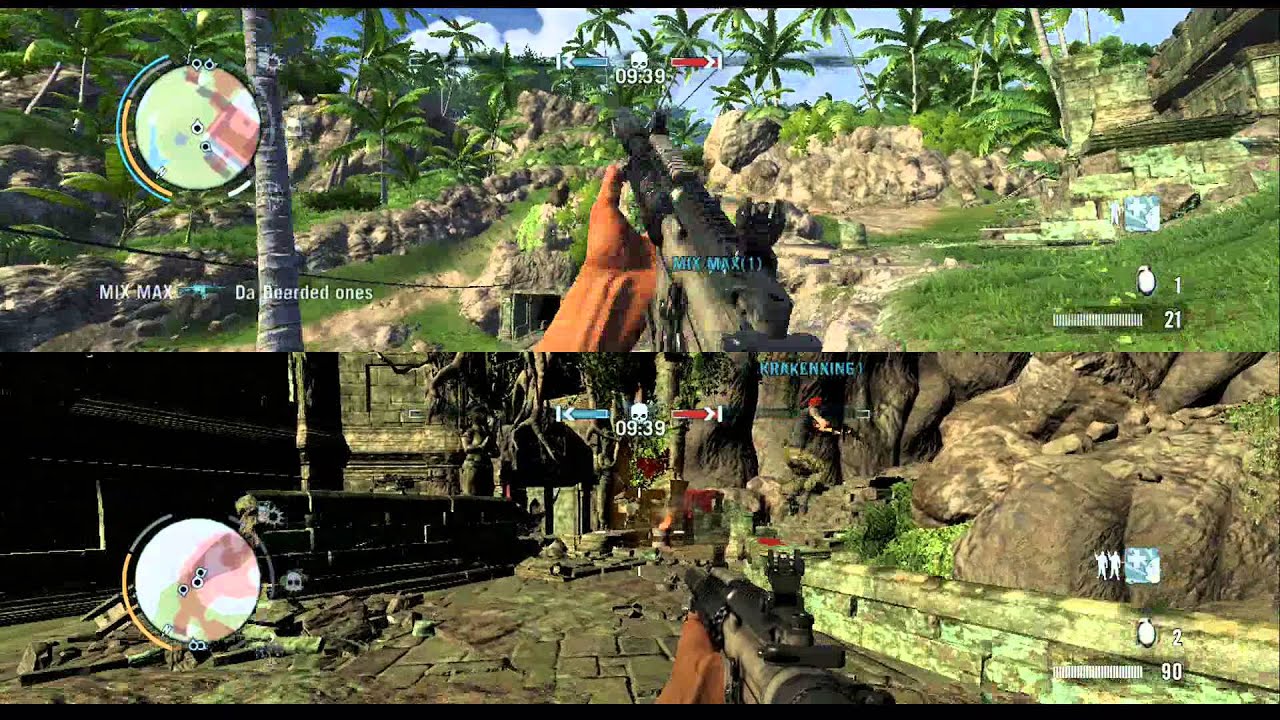
Fig 2.2 Far Cry 3
Here is the attached Google Docs of our new game idea "Legendary Hunt of the Night"
https://docs.google.com/document/d/1MLT6IdbOdIXd51dQE1ljINjM-5N5xRi9Ooa-duHwQFk/edit?usp=sharing
__________________________________________________________
FEEDBACK
15/4/20 (Week 1)
There was no feedback given this week.
22/4/20 (Week 2)
There was no feedback given this week.

Comments
Post a Comment